FRAMING TUTORIAL: Sky Art Prints in Pottery Barn Wood Gallery Frames
Hello,
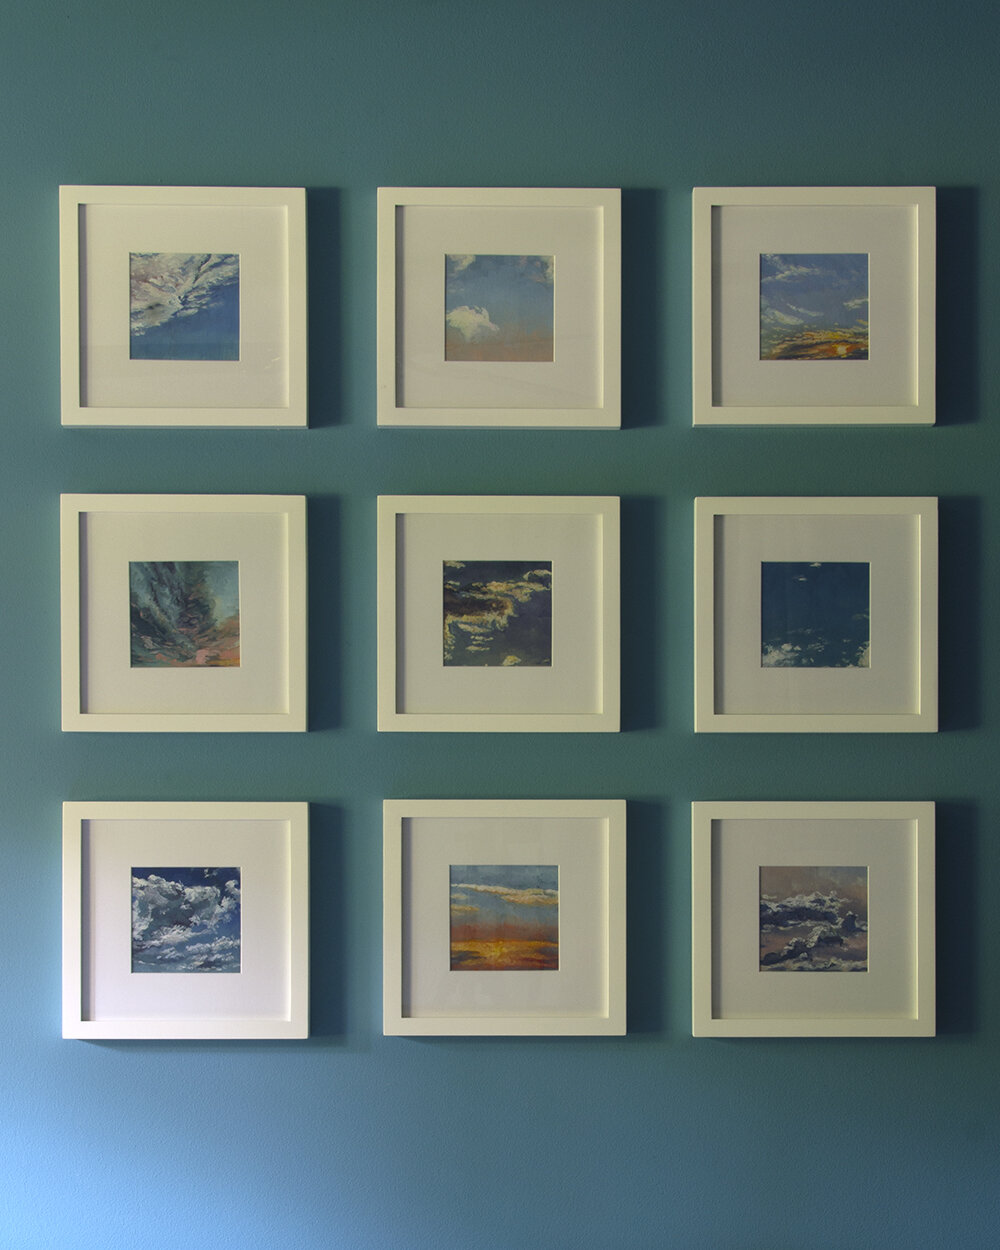
I am excited to share how good my “Smitten with the Sky” fine art prints look when framed and hung. Today, I want to show you how to create a dynamic gallery wall with my well loved Sky Prints.
And you too can create this in your home with a few simple supplies.

What you need:
One or more of my 6 x 6 inches art prints. I used this set of 9 favorite skies!
Pottery Barn “Wood Gallery Frame” that displays 5 x 5 inch photo. ( I chose the modern white finish.)
Bone Burnisher, (the backside of a spoon works too)
Hammer to hang hooks
Painter’s tape

1. Gather your supplies and prep the frame. The Pottery Barn frames come with a layer of tissue paper and a spongy protective sheet. I laid this on my table to avoid damaging the frame’s finish.

2. Remove the backing and cardboard layer till all you have is the matting and glass in the frame. Use two pieces of artist’s tape, use ample amounts and tape to top side of canvas print and matting. You leave the bottom untapped because the matting and canvas print will shift at different rates, and this makes sure the canvas print will not wrinkle in the frame. Use a bone burnisher and rub with firm pressure to make sure the tape is adhered to canvas print and matting.

3. Replace the cardboard inner lining and the frame backing, close, and it is now ready to hang.

4. I like using “OOK” picture hangers, these 10 lb ones are perfect for these frames.

5. use the provided hanging templates that come with the Pottery Barn Frames to create the layout of the gallery wall. Attach the picture hangers and then remove the template and hang the framed art prints.
Voila! A fantastic gallery wall to add interest to any room!
